
Mechanical Splicing vs. Fusion Splicing
Fiber has become more widely integrated thanks to its bandwidth, reliability, durability and cost. In fact, many integrators have standardized on universal fiber cables with plenum indoor/outdoor ratings for both residential and commercial prewires thanks to trade costs starting at $0.20 per foot.
However, bulk cable alone won't make an installation -- fiber requires connector termination to integrate electronics and, thankfully, the tools required to install optical connectors have also become more affordable and easier to use.
This article explores the different methods of terminating cables, also known as "splicing", and the pros and cons between each method. The article's summary is contained in the chart below.

Additional information on connector formats, fiber optic tools, and termination process (including step-by-step videos) is available in the TechLogix Fiber Optic Resource Guide.
The Basics
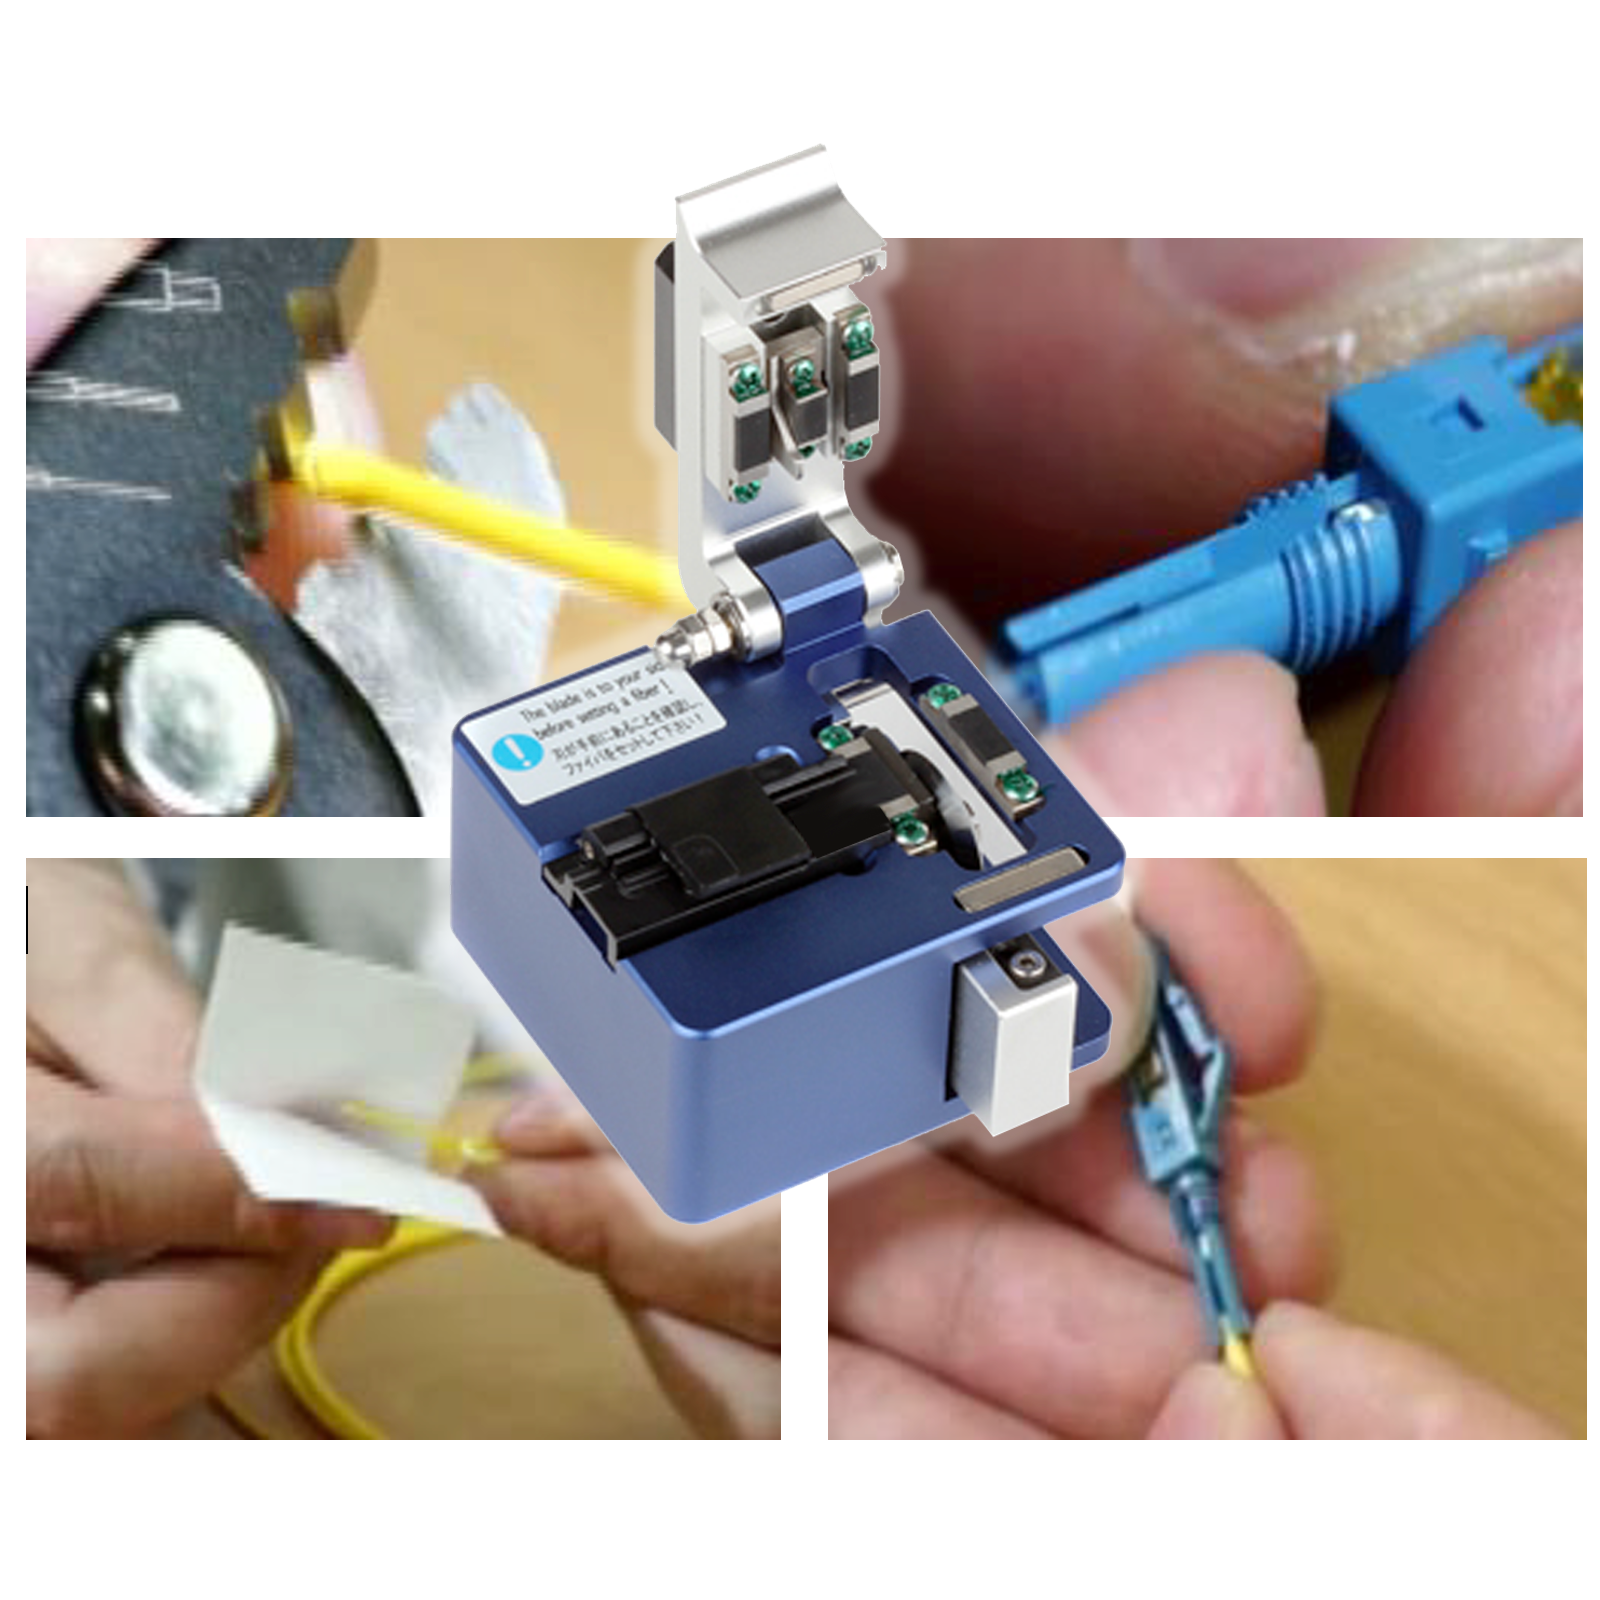
Fiber optic connector termination and/or the joining of two separate fiber optic cables is known as "splicing" and splicing can be accomplished with two common methods:
- Fusion splicing -- using heat or an electric arc to weld the two separate pieces together
- Mechanical splicing -- using a self-contained assembly to hold the two separate pieces together
Fusion splicing, as implied by the name, actually fuses the two cables together, whereas mechanical splicing simply holds the two pieces in place.
Each splicing method has advantages; though before we discuss the pros and cons it's important to understand what each method is not -- messy, time consuming and specialized.
Early splicing systems required messy and onerous steps including manual polishing and the application of liquids and epoxy; however, modern systems, including TechLogix ECOConnectors, leverage factory pre-polished connectors with encased index matching gel, allowing for quick, easy and clean terminations in the field.
Tool Cost
The most notable difference between mechanical splicing and fusion splicing systems is the tool cost and, frankly, this can be a barrier to entry for many integrators.
Reliable fusion splicing systems typically cost upwards of $5,000 with many ranging toward $15,000+. The majority of the cost is the fusion splicer itself which must heat or weld the fiber strands together. This unit also requires in-field power, setup time, and periodic maintenance.
Mechanical splicing systems, on the other hand, cost around $500 and include mainly wear components that can be individually replaced (kevlar sheers, cable strippers, etc.).
Tool costs alone tend to sway many integrators toward mechanical systems, especially if fiber is still an occasional installation for them.

Connector Cost & Format
Connector cost and format also plays into the consideration between mechanical or fusion systems.
Mechanical systems use field-installable connectors to terminate the end of the cable and field-installable splices to join two cables together. Depending on the manufacturer, these connectors and splices can be crimp-on or snap-on.
Snap-on mechanical connectors and splices, such as TechLogix ECOConnectors and UNIV-SPLICES, command a major advantage of being re-usable and relatively low cost (starting around $5 per connector depending on the format).

Crimp-on mechanical connectors and splices, on the other hand, cannot be re-terminated and tend to cost significantly more (starting around $12 per connector depending on the format).
Unlike mechanical systems which include separate connectors for the ends of cables and splices for joining two separate cables, fusion-based systems only splice two separate cables together. Therefore "pigtails", or short pre-terminated cables, are used for connector termination. Pigtails are available in a variety of constructions and typically cost less than mechanical connectors (starting around $2 per connector depending on the format).

Setup and Termination Time
Setup and termination time varies between mechanical and fusion splicing systems and proper selection is often based on the scope and frequency of the installation.
Mechanical splicing systems setup quickly -- basically as fast as you can unpack a tool bag -- whereas fusion splicing systems typically require 10 or more minutes to fully deploy. Additionally, fusion systems require power through an AC connection or batteries and take up significantly more working space.
Once setup, the actual termination process for both mechanical and fusion splicing systems is similar: most mechanical connectors install in around 30 - 60 seconds, whereas most fusion connectors install in around 20 - 45 seconds.
Higher-end fusion systems do have one significant advantage: they can fuse multiple cables simultaneously. That means 20 - 45 seconds can terminate 6 strand, 12 strand or even higher strand count cables when using a multi-strand pigtail -- a major time saver on very large projects.

Performance
Performance, mainly signal loss, also plays into the selection of mechanical and fusion splicing systems.
Fusion spliced connections offer very high quality light transmission and low reflectance, resulting in an overall average signal loss of 0.1 - 0.2 dB.
Mechanical spliced connections are subject to more variability based on the connector style and termination process used, resulting in an overall average signal loss of 0.2 - 0.3 dB.
The higher loss in mechanical systems is still within virtually all installation "link budgets", or the acceptable loss tolerances of the installation and its electronics, and for that reason more and more mechanical connectors are being deployed.
In summary, there isn't an all around better splicing style. Fusion and mechanical systems both have their advantages and disadvantages, and your selection should be based on budget, frequency of installation and type of installation.
Additional information on connector formats, fiber optic tools, and termination process (including step-by-step videos) is available in the TechLogix Fiber Optic Resource Guide.
Comments